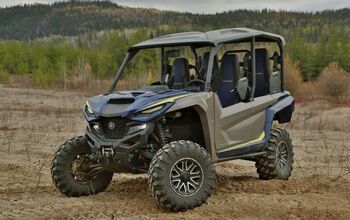
How to Replace Your SxS Shock Springs
There is no denying just how much of an improvement you can get out of your suspension with a spring change. New springs help you get the most from your shocks, with a custom ride and improved handling, all for less than the cost of custom-made replacement shocks. While it may seem like an intimidating project, with the right tools, like Eibach’s Spring Compressor, it is a project you can take on and see immediate results.
Getting Started
Before you start tearing things apart, the best advice we can give you is to make sure you’re starting with a clean surface. Working on your shocks will be much easier of you wash off the mud and dust and let it dry.
You will need a jack and jack stands to secure your machine when you remove the shock. You will also need the proper wrenches to remove the shock. A powered socket wrench is a great tool to use for this. Next, you will need a vise to hold the shock while you work on it. We suggest using a rag or other material to keep the vise from damaging the shock. You will also need the Eibach Spring Compressor. If you don’t want to get the compression tool, you can use ratchet straps, but the compression tool is easier and safer.
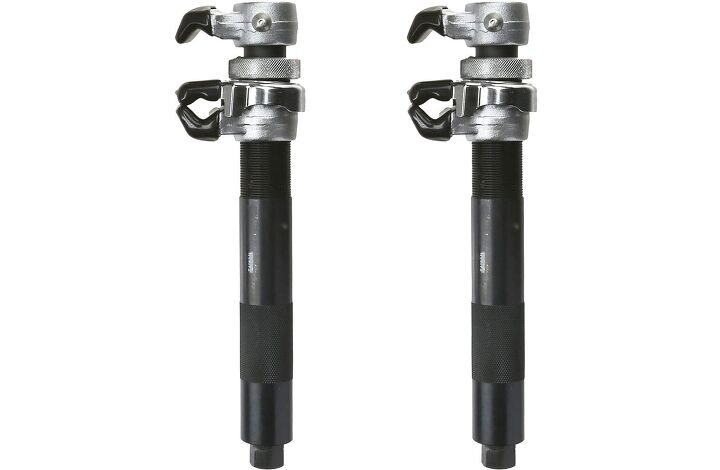
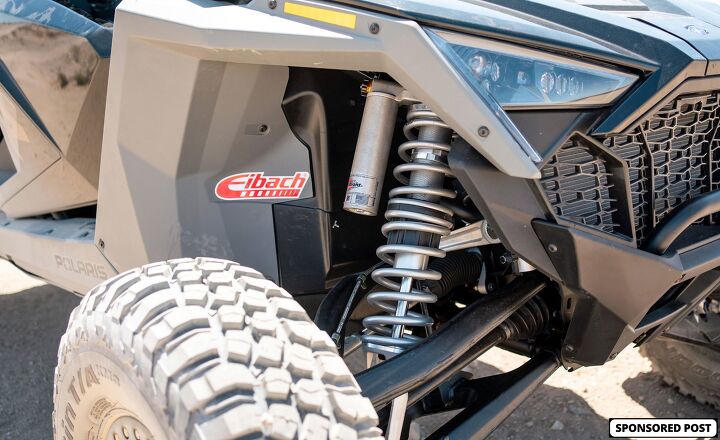
The Eibach Spring Compressor is a two-piece, internally-threaded spring compressor That works with 1 to 11 inches of travel. It will withstand 2,645 pounds maximum of working load. You work the tool with a simple hand tool and the compression tool’s ball bearing load surface steadily and securely compresses the spring evenly. Eibach built in three safety mechanisms to provide backups that keep an accident from happening. The clamps have vinyl coated ends that protect the spring from damage and additional safety jaws keep the compressor stabilized on the spring. If used properly, it will safely and evenly compress the spring in minutes, letting you swap in the new spring.
The Process
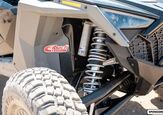
With the shock removed from your SxS, place the end of the shock without the shock collar into the vise and tighten it down. Depending upon the amount of travel in your shock, set the compression tool to take in several inches of travel in the shock. That is what is nice about the Eiback tool. With 11 inches max of movement, you can work on any size shock, from a short-travel shock with 6-inches of travel, up to a 22-inch travel RZR shock. For the sake of this discussion, we’re going to use the compression tool. Once you have it clamped onto the shock spring, you’re ready to start the next phase.
With the spring ready to compress, evenly apply equal tension to each side of the spring to compress it in a straight line. You do not want it to bend. Compressing one side of a spring faster than the other will get everything out of whack. Think of holding a Slinky by one side. Remember how it bent over? You don’t want that.
With the spring evenly compressed enough for the shock collar to move freely, slide the collar off the shaft of the shock and away from the shock. This should allow you to lift the spring off of the shock. Once you have it off, retrace the process of slowly and evenly releasing the compression tool and taking the tension off the spring.
Reassembly Time
Take your Eibach Spring Compressor and place it onto the new spring. Repeating the steps for taking the spring off, slowly and evenly compress the new spring so you can slide it onto the shock body, leaving room to slip the collar back on. If you are using a spring setup like Eibach’s Stage 2 or Stage 3 springs, make sure you compress the spring enough to have room for the secondary springs. You may need additional compression tools for multiple springs, so be sure to measure everything before you get started. With the spring, or spring in place, slide the shock collar back on and slowly release the spring tension. Now you’re ready to reinstall the shock on your machine.
When you install the shock, it is a great time to check the bushing and add a little grease to keep everything smooth. Tighten everything back to spec and you’re ready to hit the trail again. If you swapped in new Eibach springs, you’re going to notice a serious improvement in performance and ride quality. It’s not as hard of a task as you might think and it gets you back on the trail with better suspension.
NOTE: This is sponsored content produced in partnership with Eibach.
More by Sponsored Post